We recently had a customer replace the neck on a Tele, that despite throwing a lot of time, effort, and money at, just never played right. He purchased a Fender replacement neck and after playing it for the 1st time, handed me the problem neck and said, “Here, take it!” And thusly, unknowingly at the time, this seed for this blog entry was planted!
The steps...
- Start with a guitar neck that requires a refret
- Pull the frets and strip the neck of finish
- Scan and Plane the fretboard in the Plek machine
- Install new frets into the neck
- Level and crown the frets in the Plek
- Final sanding and polishing by hand
Along the way, we'll gather photographic evidence to help understand what the Plek Machine does and why it's an improvement. Before and After pictures of the radius and fingerboard will be shown so you can see the changes.
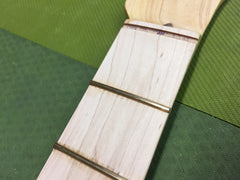
Back Story/Side Note: I have a nickel allergy so I use Jescar EVO fretwire which is nickel-free, almost as hard as stainless steel, but sounds more like a nickel fret: the best of both worlds! Since these frets are made from copper and titanium, they carry a light gold appearance. I pulled the original nickel frets, stripped the original nitrocellulose lacquer finish, sealed the neck with a couple of coats of Tru Oil on, stuck it on a body, and brought it to the shop to start the Plek Refret Process.

First, George scans the neck in the Plek Machine to get a readout of the fingerboard. The machine literally maps out the changes in height on the fretboard in ten-thousandths of an inch, from the nut to the end of the board. Heck, I have a hard time seeing a 16th of an inch these days! In doing this initial scan, we discovered exactly why this neck was never able to play well...
Problem #1: The Fingerboard Radius at the 1st fret was a 10.8” while the 5th fret was 9.2” and the 12th was 9.0”… THAT’S THE WRONG DIRECTION!
Here is the scan showing the fingerboard radius before being corrected by the Plek Machine. Notice Frets 1, 12, and 21 are shown from left to right with their corresponding radius shown in green underneath. This neck had a reversed compound fingerboard radius.

It's fair to say that unless a fretboard radius was shaped with a Plek Machine during manufacturing, it could be more accurate. We have seen loose tolerances from almost every manufacturer but this neck is notably bad. You don't see a radius this poor every day and that's only the 1st problem!
Problem 2: Where the neck and body meet, there is a sizable hill to climb, or a hump, making any bend above the 12th fret choke out painfully (look to the right of the Blue Bar in the picture below). This area needs to be lowered considerably in order to make the neck playable. Below the 12th fret, we see inconsistencies horizontally across the strings. At the 1st fret on the bass-side, we actually have a good reading but on the opposite side of the fingerboard, it is taller or higher. Even across the same frets, we have inconsistencies to correct! Some guitars are easier than others. This is an 'others'.
Here is what I call the 'Relief Map'. Each string is labeled on the far left. The left side of the pic is closest to the nut while the right side is closest to the 21st fret. The Red Line is what the fingerboard is actually doing while the green line is what it should be according to the machine. Again, the numbers in the boxes are measurements of 10,000th's of an inch.
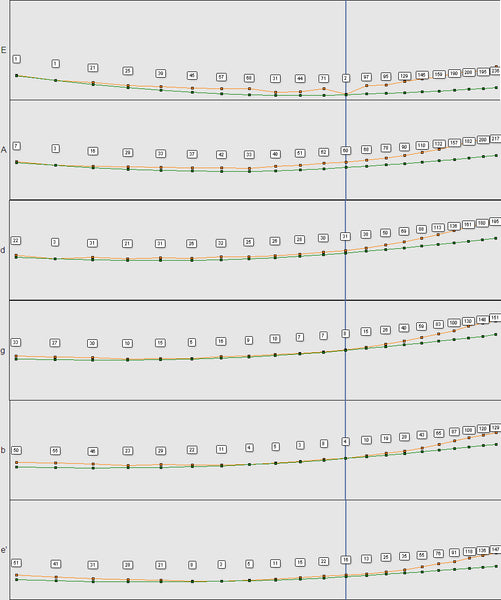
The highest number is 236, or .0236" which doesn't seem like much but it is at the highest point on the Neck under the E String sitting atop a hill that has been climbing since the 12th fret on. Without planing the fingerboard, re-fretting this instrument would only be a lateral movement as notes will continue to choke out without having this upper area attended to. If bending strings is like pushing a boulder, then bending on a neck with the problems outlined here is like pushing that same boulder uphill.
Luckily, with some real-world-know-how (50+ years of tech experience), an Amazing Tech like George, and the Plek Machine, a neck this poorly made can still play like a dream. George adjusts the tolerances and heights according to the differences between actual and potential. With the Plek Machine being able to measure and cut with unmatched precision, we are looking at the closest to perfect playing surface possible. This particular guitar neck was in need of many tweaks, many scans, and a couple passes through the plane process in order to achieve Plek Success!
Now that the hard work has begun, let's check out the updated fingerboard radius shown below. It's far more even from the nut to heel, and (*sounding horns*) it's not more flat in lower positions than higher positions! We finally have a playable neck in ALL positions that isn't choking out even on half-step bends!

Here are the after pics, once the fingerboard was planed...
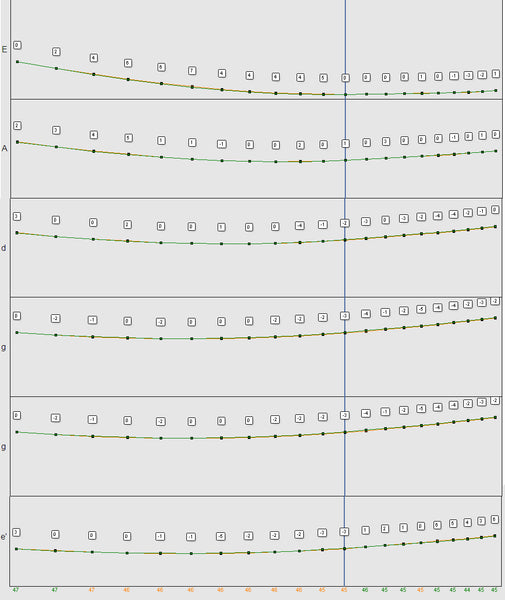
Notice there were considerable adjustments across the entire fingerboard. The Red and Green lines are on practically on top of each other signifying very tight tolerances. With the loosest tolerance now being +.0006" (previously +.0236"), we are looking at a fingerboard that is more accurately planed than one could reasonably expect anyone to do by hand. That's only 6, 10,000th's of an inch for the loosest tolerance!
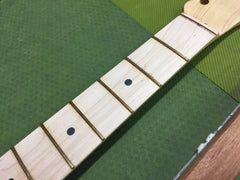
From there, the neck was passed on to our Refret Specialist, Pete Flynn. Pete installed the new Fretwire by hand, which is easier said than done. The EVO Fretwire from Jescar is tough to re-radius, rough on files, and not very forgiving. Pete did a fantastic job, seating each fret with the touch of an expert, and cleaning up the fingerboard along the way. I did some real damage when I removed the frets so I was worried that it would be scarred badly. Luckily, Pete's 40+ years of experience have presented him with much worse! The playing surface came out perfect! The fretboard is precisely leveled and the frets are perfectly seated resulting in a rock-solid playing surface.
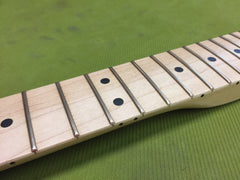
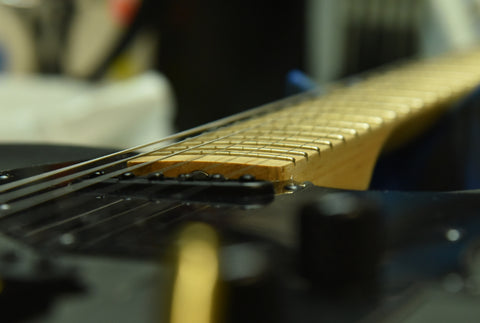
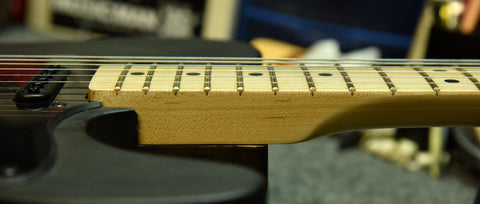
Here are a few pics of the fingerboard to check out. The 1st two are before the fingerboard was cleaned up and the 3rd is after being all spruced up! Spruce? No, it's Maple!
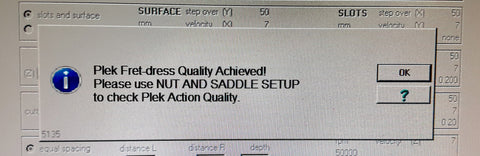
From there, George put the freshly fretted guitar back into the Plek Machine and did the level and crown fret dressing. This thorough process scans, maps, trims, and shapes the frets with a perfect crown. After George has the machine take care of dressing the frets, we move on to our 11 step polishing process which makes new frets appear like a Burning Lens! Gleaming, shining, and glaring light back at you, our polishing process insures a glass-like, smooth surface on the fingerboard. This is the icing on an otherwise perfectly baked cake.
The Results: We have a guitar neck that is as playable as it can be. The precisely planed fingerboard allows for evenly seated frets which reduce inconsistencies, high spots, drag, and buzzy zones across the entire fretboard. 2 whole step bends are achieved above the 12th fret where half steps bend's used to choke out. Chords ring out with less fret rasp. Notes sustain for longer since there is less fret interference from high spots and inconsistencies.
These days, there are replacement options that are less expensive than our re-fret process. While a new neck is a viable option, unless it was made with a Plek machine, we can make your old neck outperform a new neck. Plus, you'll need to add a new nut, tuning pegs, a Level and Crown if you want it to be less buzzy, and we are neighboring the cost of our Plek refret. In other words, a new neck does not play as well as an old neck that has gone through our Refret and Plek Machine process. In fact, if I told you what tier guitar this neck was on, you'd be surprised... and disappointed!
It's important to note that the Plek Machine doesn't completely eliminate Frett Buzz but it reduces it to the point that the player is left to blame. Yes, it can be YOUR FAULT that your guitar buzzes! A guitar will always have the potential to buzz. I can still MAKE this guitar buzz by playing it with poor technique. For instance, if I push the low E string down into the frets and fingerboard with my right thumb, that's (generally) a buzz I earned from poor technique. But it can also be a bad setup, a bowed neck, poor fretwork, a bad nut, all of the above, or other stuff! With so many things to account for, it's easy to misdiagnose issues or make adjustments that aren't in the right order. Come see us so we can help you chart the best course of action for your problem neck. Many times a Full Set Up is all it takes but in cases like this, it needed MUCH more attention, in fact, as much attention as we could possibly provide!
We can assure you once you get a neck re-fretted by us, that guitar will become your #1. This is both a promise and a sort of unintentional threat. Please allow me to explain... You just won't pick up your other guitars that don't play as well. We have many customers who won't take delivery of a guitar until it has gotten at least a level and crown in the Plek Machine first. If you had ice skates that were always perfectly sharp, would you use the pair that isn't? Would you continue to use a Driver that you maxed out at 250 yards with versus one that goes a minimum of 300 every time? If you had a fishing rod you always landed something with, you'd probably use it most often! I think you get the point. And I am speaking from experience, I mean, I can't skate, don't golf, and certainly don't have a magic fishing rod but I have had several necks go through this process and my guitars are among the most playable that I have EVER played. With 31 years of playing experience, 21 years of teaching, and 20 years working in 2 of the best Chicago-based Music Stores, I have experienced several lifetimes worth of mostly High-End guitars from around the Globe. And while I don't like to subscribe to any rules, I must acknowledge that any instrument that hasn't been Plek'ed has the potential to play better.
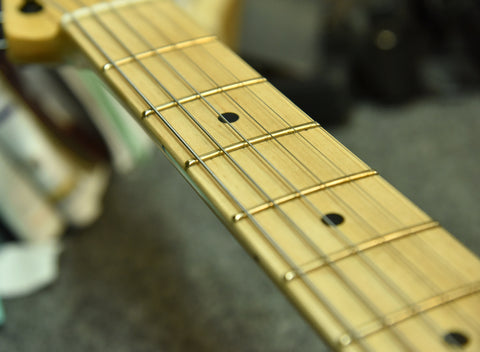
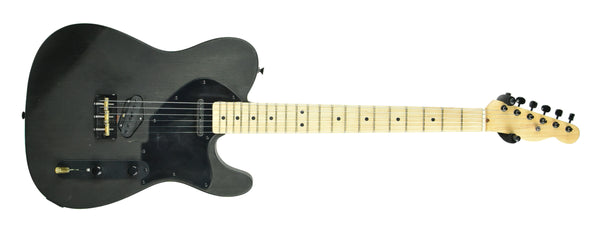
Here is the neck on the finished guitar. A Tele body with Strat Contours, Porter Pickups Blackout 9T Pickup Set, Wilkinson Half Bridge, Rutters Brass Comp Saddles, and a homemade 40 S&W caliber bullet switch tip.
I hope you found this blog post informative. It's a crazy concept to chew on but once you get it and you play a guitar that has gone through the whole process, it's all becomes crystal clear! I'll be adding a couple videos to this blog post once I have the chance to put them together. Thanks for checking out this edition of the blog! - Mathew Jenkins
This article was penned by Mathew Jenkins with fact-checking and editing from George MacPhail and Pete Flynn. George is the Captain of the S.S. Plek, Pete is Colonel Refret, while Seaman Apprentice Matt just swabs the poop deck.
…..very nice work !….
Good stuff, hope to have you guys PLEK my ’76 Les Paul soon!
Very interesting to read you
Good luck to you